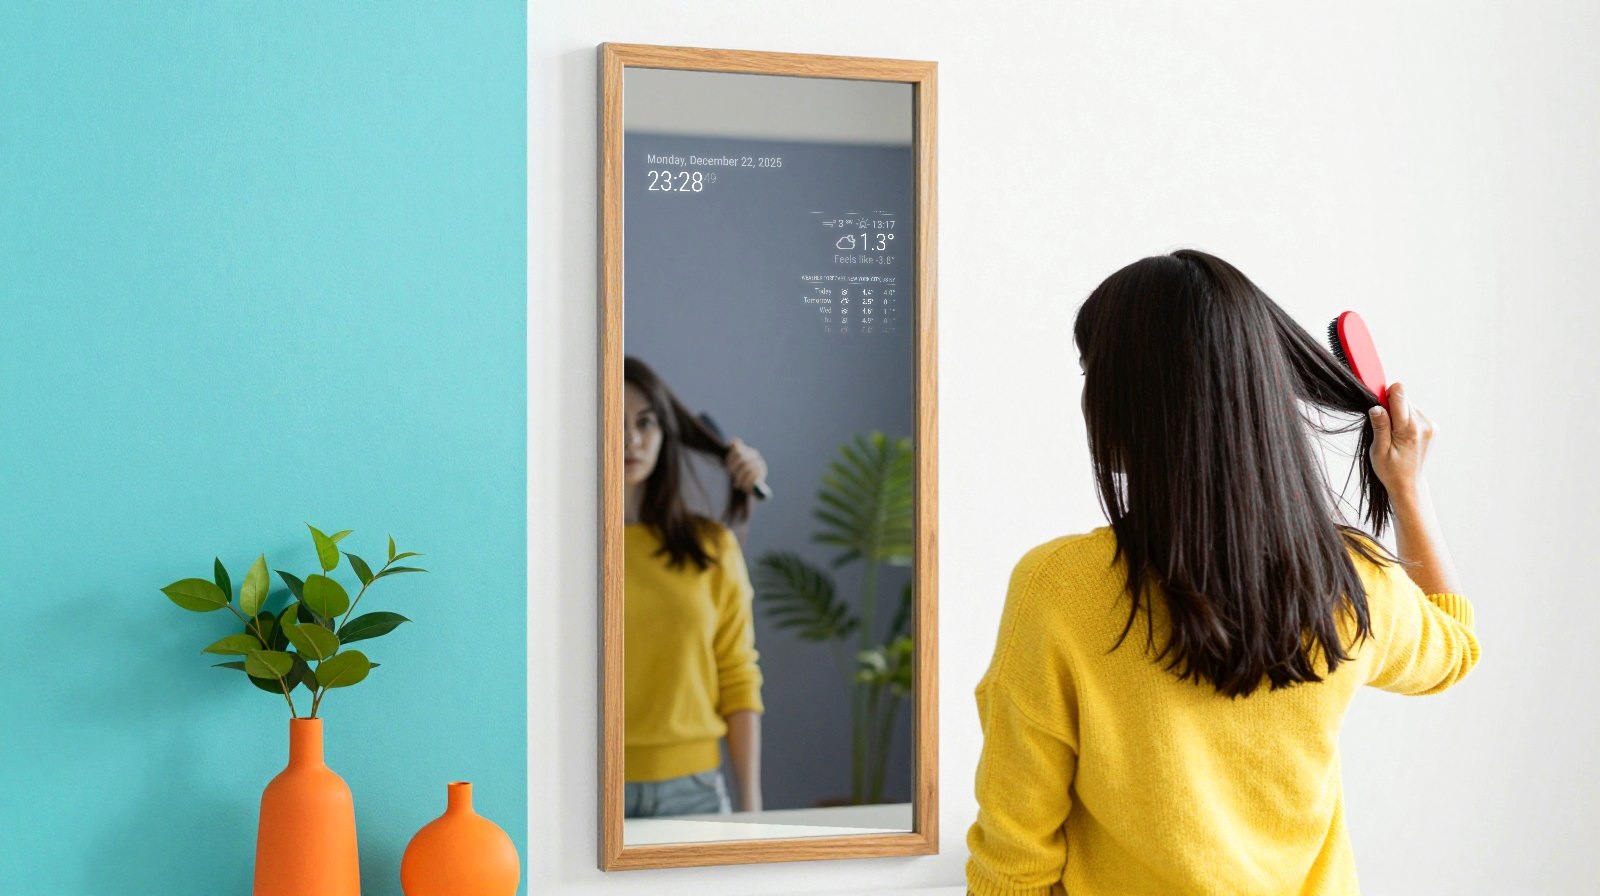
Imagine checking the weather, your calendar and the time while you brush your hair, all glowing right there in your mirror. You can build one with a Raspberry Pi, a slim screen and a special sheet of mirror. The free software that makes it work is called MagicMirror², and it’s one of the best-loved Pi projects ever made.
Why it matters: it’s a real, useful object you’ll see every day, not a board in a drawer. It’s also a lovely first project, because the tricky part is finding the right pieces, not the coding. You can choose what it shows, and it stays a real mirror you can use: tall, upright and ready for the morning rush.
How does a mirror show a screen?
The secret is a two-way mirror. It reflects most of the light that hits it, but lets a little pass through. Put a bright screen right behind it and two things happen: white text shines through, while the black parts of the screen stay reflective. That’s why MagicMirror² uses white letters on a pure black background. With nothing else on screen, it simply looks like a mirror with words floating in it.
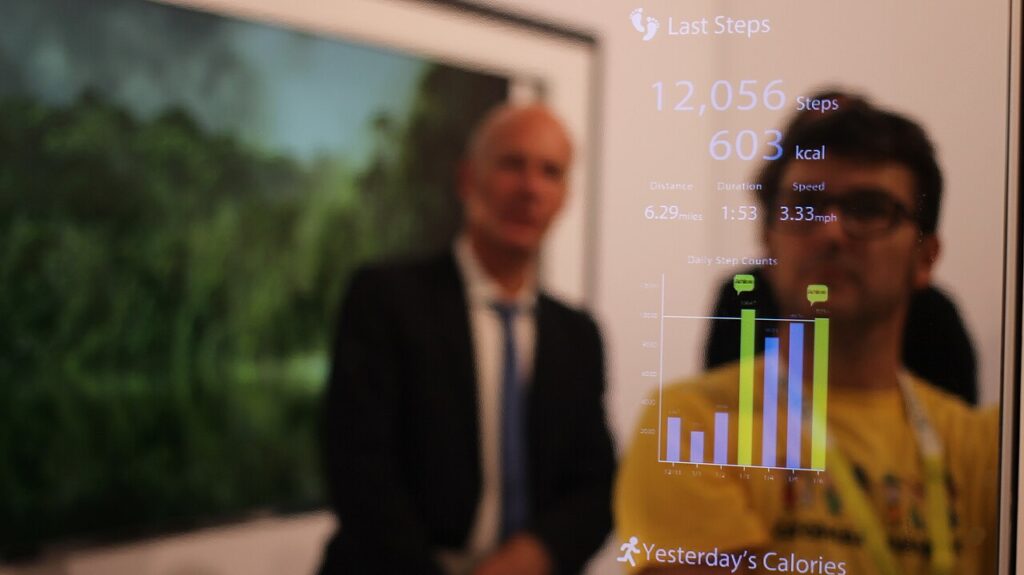
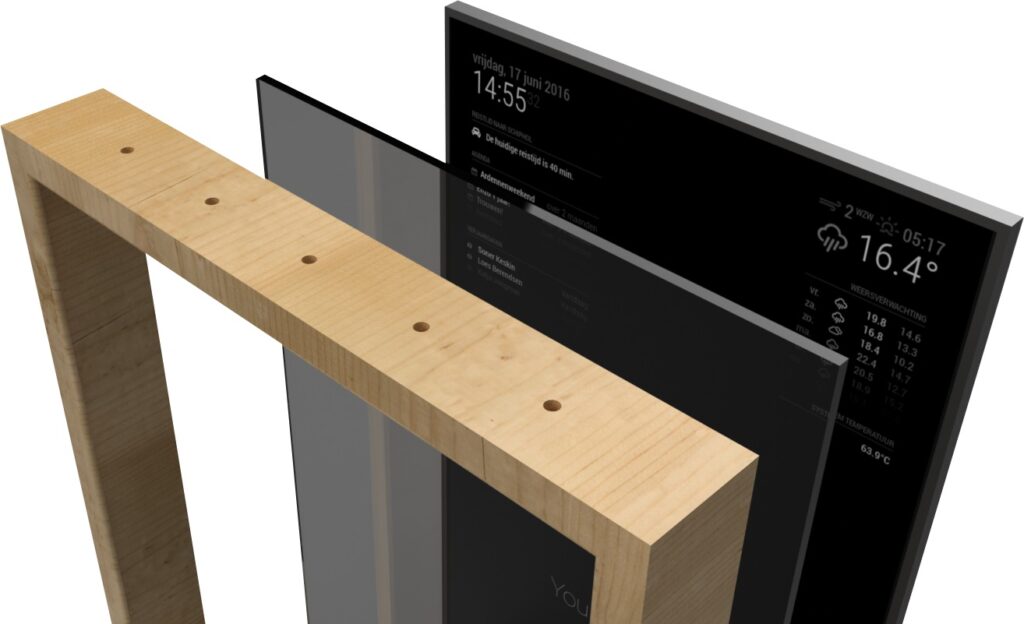
Out of the box, MagicMirror² comes with a clock, calendar, weather, news headlines and friendly compliments. Its community adds many more through third-party modules. Each one is a small block you can place where you like on the mirror.

What kind of smart mirror would you like to build?
| Tabletop mirror | Wall mirror | |
|---|---|---|
| Screen | 15.6-inch portable monitor, upright | Old computer monitor, upright |
| Mirror | Thin acrylic sheet | Large acrylic or real glass, cut to size |
| Build time | An afternoon | A weekend |
| Difficulty | / | |
| Best for | First-timers | Anyone handy with a saw |
Build times and difficulty are our own estimates. Difficulty: easy · moderate · difficult · expert.
Our pick is the tabletop mirror: no glass to cut, nothing to hang, and you can stand it on a shelf. Acrylic is lighter and safer, though real glass looks sharper. Whichever you pick, measure the screen first, because the mirror needs to be a little bigger than it.
The build, step by step
We didn’t build this one ourselves. The software steps follow the official MagicMirror² guide:
- Prepare the Pi: install the full Raspberry Pi OS, with its desktop. The Lite version won’t work.
- Install the software: add the required version of Node.js, then download and install MagicMirror². This can take a long time with little on screen, so don’t stop it.
- Make it yours: copy the sample settings file, then type in your town and calendar. It’s a text file, so take it slowly.
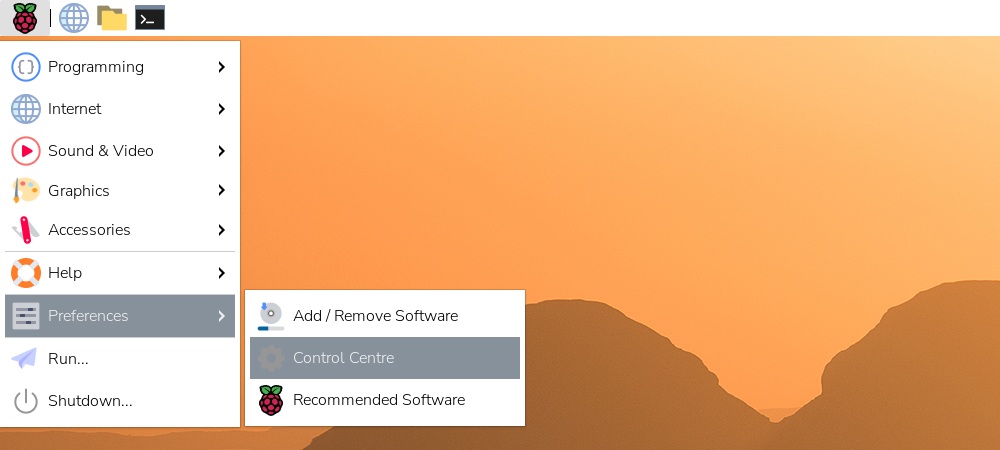
- Stand the screen upright: smart mirrors are tall, so turn the monitor on its side. Then click the Raspberry Pi icon, go to Preferences, Control Centre, Screens, and set Orientation to Left or Right. Select Apply, then OK.
- Test it on the screen: check that everything looks right before you touch the mirror.
- Put it together: peel off the protective film, then place the mirror against the screen, shiny side facing you. Cover any spare mirror with black card so light from behind doesn’t spoil the effect.
- Add a frame: wood, a deep picture frame or a 3D-printed stand all work. Leave room for the cables and a little air.
Tips for a great result
- Keep the screen bright and the room lit: the mirror effect works best when there’s more light in front than behind. Thin acrylic can also bend a little, so support it evenly.
- Stop the screen going blank: check Screen Blanking in the Control Centre, under Display, so your mirror doesn’t go dark after a few minutes.
- Choose the Pi sensibly: MagicMirror² runs on a Pi 2, 3, 4 or 5, but not on a Pi Zero or Pi 1. One builder’s guide warns that older boards can feel slow with many modules, so we chose a Pi 4 with 4 GB.
- Keep it off the internet: the project warns you should never make it directly reachable from the internet. Inside your home network is fine.
- Be careful with add-ons: third-party modules and installers aren’t maintained by the core team, so check them first.
- Use mains power sensibly: keep the Pi, the screen and their chargers well away from water if your mirror goes near a bathroom.
Ready to Make? Our Raspberry Pi smart mirror parts list has everything you need, including the cable that catches people out with portable monitors.
What happens next
Once your mirror is on the wall or shelf, the fun is in the details. You could add your family’s calendars, your bus times or a daily quote. The project’s community list of modules keeps growing, so your mirror can keep learning new tricks long after you’ve finished building it.
Read next
- Got a Raspberry Pi? You can now enjoy your own air traffic control tower at home
- Build a Raspberry Pi safety camera that alerts your phone
The week's best tech stories, free
One email a week with the stories that matter, explained simply. No spam.
Sources
- Configuration – Raspberry Pi documentation, consulted 6 November 2026
- Requirements – MagicMirror² documentation, consulted 6 November 2026
- Installation – MagicMirror² documentation, consulted 6 November 2026
- Modules – MagicMirror² documentation, consulted 6 November 2026
- MagicMirror² – Michael Teeuw and contributors, GitHub, consulted 6 November 2026
- How to build a Raspberry Pi smart mirror – SunFounder, consulted 6 November 2026